About Us |  Contact Us |  F.A.Q.s |  Installation
Main Products
by Car Model
ALFA ROMEO
BMW
FERRARI
FIAT
JAGUAR
MERCEDES-BENZ
PORSCHE
SAAB

Color Samples

Other Products
SPRAY DYES
FLOOR MATS
COCO MATS
CONVERTIBLE TOPS
CONVERTIBLE TOP CARE
LEATHER CARE
RAW MATERIALS
GIFT VOUCHERS
website security

Installation Instructions

Some World Upholstery products can be installed by an amateur restorer. No instructions are provided for products that we feel require a professional trimmer.

close [x]

Mercedes-Benz W111 Door Panel Skin « Installation « Home   

Questions? Call (805) 921-0100 or (800) 222-9577, Monday - Friday, 8 am to 5 pm PST. Click to e-mail us anytime!

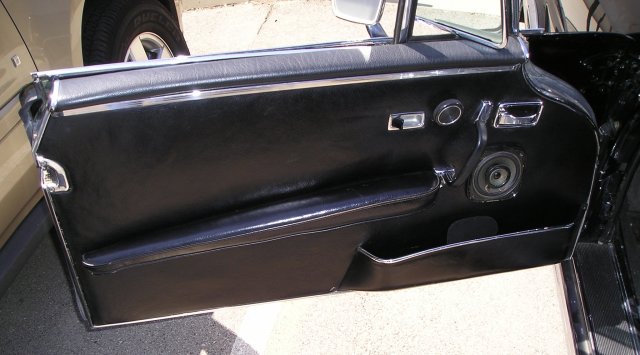
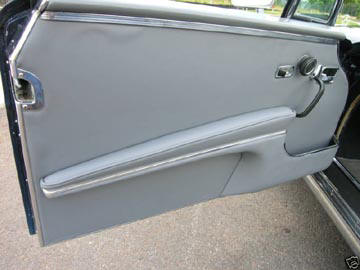
Mercedes-Benz W111 Coupe & Cabriolet (220SEb, 250SE, 280SE, & 300SE)

Mercedes W111 Coupe/Cabriolet

Mercedes-Benz W111 Door Panel Skin Installation Instructions
For Covering Door Panel Board (Product #: 111-0053, 111-0054, 111-0063 & 111-0064)

To Order this product by Phone, Call (805) 921-0100 or (800) 222-9577, Monday to Friday, 8 am to 5 pm PST

The following information is supplied as a customer service guide only. World Upholstery & Trim recommends professional installation of all our products. No guarantees are granted with regards to the use of this guide.


Tools required:

  • Scissors or Sharp Knife
  • Phillips & Slotted Screwdriver
  • Metric Socket Set
  • Awl or Punch
  • Drill
  • Pliers
  • Small Hammer
  • Contact Adhesive
  • Rivets

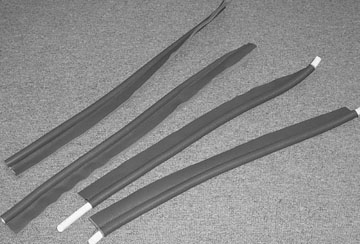
Special Note: Mercedes W111 Coupe and Convertible door panels originally were covered in leather and came in 2 styles. All 220SEb and most European 250SE and 280SE models had door panels with a long hard pocket which came up to the armrest. Most US 250SE and 280SE cars had a smaller hard pocket. Overall panel dimensions were the same. If ordering, please advise which style you have and if your car has power windows. Our kits include 4 modern pre-cut waxboard panels with 1/8" padding, sewn covers for front and rear armrests, precut leather to cover all exposed surfaces, as well as windlace and rivets.

Mercedes W111 Short Pocket

Short Pocket

Mercedes W111 Long Pocket

Long Pocket


Removal of Panels:

  • It is best to do one side at a time with the other side in place for reference.
  • Do not discard any old parts until installation is complete.
  • Remove the front and rear seats. They use 10mm bolts + electrical/vacuum connections.
  • Remove the Windlace:
    1. Remove the front kick panel and edge trim securing windlace.
    2. Pry windlace from the car (glued) and clean glue from surface below.
  • Remove the Door Panel:
    1. Remove the 3 chrome trim pieces on the trailing edge of the door. It uses Phillips screws.
    2. Remove the door capping by unscrewing the phillips screw exposed under the trailing edge. Gently pry up to release the clips then slide forward to remove.
    3. Next remove the screws securing the armrest, door lock, door handle, window winder and the lock surround. On the 250 & 280 models, there are plastic inserts under the interior door handle and quarter window knob. You will see a place to insert a small flat screwdriver and pop the inserts out.
    4. Under these inserts are phillips screws which holds the metal escutcheon and knob to the door. Remove them.
    5. Lastly remove the 2 small phillips screws securing the panel at the upper corners. Disconnect wiring if applicable and lift the panel up out of the front and lower channels.
    6. If the plastic water vapor barrier glued to door (now visible) has any holes, now is a good time to repair or replace it.
  • Remove the Quarter Panel:
    1. Remove the chrome trim at the front edge of the upper capping and remove the small screw locking the capping.
    2. Gently pry up and tap the capping rearward at the same time to release the clips.
    3. Remove the single screw securing the panel to the floor of the car and the 2 screws at the top.
    4. On cars with a vacuum seat release button be careful not to break the plastic fitting where the vacuum tube attaches.
    5. On cars with wind up windows, remove the winder handle and lift the panel away. On cars with power windows pull the panel away enough to release the wire connection and the seat release vacuum line.

Disassembly of Panels:

Mercedes W111 Door Panel
  • Disassembly of the Door Panel:
    1. With the old panel on the bench remove the screws and rivet securing the armrest and pocket.
    2. Remove chrome trim on the upper edge of the pocket by gently prying up against the clipped edge then remove the inner and outer leather covering of the pocket and remove all of the old adhesive.
    3. Carefully remove the leather covering from the armrest noting the location of the listings gluing it to the structure. Remove all tacks and nails. Note and remove any spacers that may have stuck to the old panel.
  • Disassembly of the Quarter Panel:
    1. With the old panel on the bench remove the screw securing the armrest from the bottom noting the chrome trim around the lower edge then remove the staples securing the cardboard upper panel to the wood structure.
    2. Remove the old leather from the metal lower part and remove all glue residue.
    3. On cars with vacuum seat release gently pry the clip off the switch and remove.
    4. Remove the ashtray by drilling out the 4 rivets.
    5. Release the old leather along the upper, lower and rear edge of the cardboard panel and pull the leather forward to expose the rivets securing the forward metal rail. Drill out these rivets, remove and clean old leather from the part.
Mercedes W111 Quarter Panel

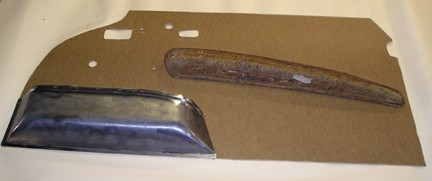
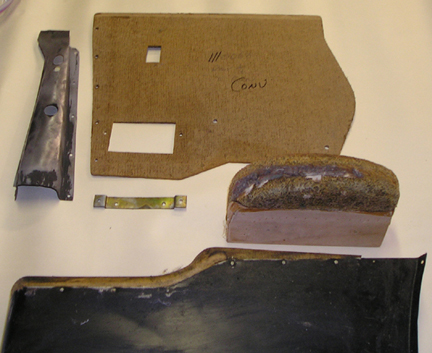
Re-assembly of Door Panel:

  • Re-assembly of the Door Panel:
    1. With panel board face up on the bench, glue a piece of 1/8" foam to the surface leaving a 1/2" space all the way around.
    2. Using the old leather as a pattern, pull the leather taut but not tight and glue to back of panel. Do not glue the front surface.
    3. Cut holes for pocket, armrest, knobs and latches that are a little smaller than what you would see with the originals.
    4. Retrim armrest with pre-sewn covers provided and screw to panel.
    5. Glue leather to both sides of the pocket then rivet, screw and glue it to the door panel. Tape the back of the screws to prevent rattles. Installation is reverse of removal.
    6. To install the assembled door panel, just do the reverse of the removal process.
Mercedes W111 Windlace
  • Re-assembly of the Windlace:
    1. Using the old windlace as a guide, trim and notch as necessary.
    2. Glue the windlace in place and re-install the retainers.
  • Re-assembly of the Quarter Panel:
    1. Using old leather as a pattern, retrim armrest, forward metal panel and lower panel with 1/8"padding and new leather.
    2. Glue the new leather covering to the back of the new cardboard panel along the front edge only.
    3. Rivet the 2 pieces together and rivet the ashtray support to the back of the cardboard panel.
    4. Apply 1/8" padding, pull leather rearward and glue edges.
    5. Rivet the ashtray to the panel and re-install the vacuum switch.
    6. Staple and nail the cardboard panel to the wood structure.
    7. Installation is reverse of removal.
    8. To install the assembled quarter panel, just do the reverse of the removal process.

Please highly consider professional installation as these panels are difficult to install!


www.worlduph.com is a registered trademark.
Any copying or reproduction of any kind must be approved by a written contract.
This website is maintained by World Upholstery & Trim Webmaster


Terminologies:

Over the years, different terminologies have been used for the same parts. To minimize confusion we've collected many of the different names to give customers some reference to the different Alfa Romeo, Mercedes-Benz, BMW, Porsche, Ferrari, Fiat and Jaguar trim parts that vary in terminology around the world.

Convertible top = soft top, rag top, head, hood, hooding, soft window Targa top, retractable top, vinyl top, top boot, convertibles arriba, converteerbare boven
Carpet = rug, rugs, carpet kit, carpet set, molded carpet, cut and bound carpet.
Seating = seat kit, upholstery kit, leather upholstery, sport seat, recaro seat, vinyl seat, cloth seat, sitzkissen, perforated, perforiert, embossed, sitzpolsterung, imbottitura sedile, asiento tapizado
Sealing = rubber seals, weatherstrips, weatherseals, door seals, window seals, gaskets, dichtungsrahmen
Panels = door panels, linings, trimmings, coverings, sun visor, sunvisor, sonnenblenden, headliner, himmel bespannung, encabezando
Trunk = boot

Materials:

Leather = hide, side, skin, cowhide, leder, cuero, Connolly, Roser, Bridge of Weir, cuoio, split
Carpet = Abetone, Dorsett, FTV, feintuft, loop, cut pile, Wilton, perlon, tufted, automatico de alfombras, teppich, tapijt, tapis
Vinyl = Spradling, China General, Freudenberg, MB Tex, ambla, leathercloth, rexine, hardura, ICI, vinyle, naugahyde
Topping = Happich, Stafast, STF, Aresma, Sonnendeck, Sunfast, dobby, lienzo, leinwand
Seat Pad =  rubber fiber pad, foam pad, gummihaarauflage, almohadilla
Sunvisor = sonnenblend, pare soleil, domenica visiera, zonneklep